C64 OS USER'S GUIDE
Chapter 3: Configuration and settings
This chapter discusses how to configure and boot up C64 OS, and covers additional set up and configuration options.
Essential configuration is done with the Configure Tool, a C64 program that is run from the READY prompt to configure an installation of C64 OS for your specific hardware setup and accessibility settings.
Utilities, run from within C64 OS, provide additional opportunities for configuration. This chapter also describes the location and format of settings files which store the current state and configuration of C64 OS Applications, Utilities and the system itself.
Using the Configure Tool
After choosing the System Card first run option in the Setup Tool, it offers to open the Configure Tool for you. At any time in the future, you can run through it again to change the system configuration. The following shows how to load and run the Configure Tool manually.
The C64 OS system directory contains a settings subdirectory in which are found most of the C64 OS settings files. In the settings directory is a program called "configure" that loads and runs from the C64's READY prompt. This configures a C64 OS installation for your specific hardware. It can be run at any time, but it should be run at least once before the first time you boot up a new C64 OS installation.
On the C64 OS system drive and partition, change current directory to "//os/settings/". Then load and run "configure". The device in the examples is #10. Use the device # assigned to your C64 OS system drive.
Changing subdirectories is required
Changing to the //os/settings/ directory before loading and running the configure tool is not optional. If you run the configure tool while //os/settings/ is not the current directory, settings files will be written to whatever the current directory is.
Alternatively to changing subdirectories manually, you may load and run c64os setup. Press "y" to accepted the C64 OS Software License. Then press "c" to change the installed location. Press RETURN to accept the defaults for device #, partition # and system directory name, then press "y" to continue.
From the final options, press "c" to configure C64 OS settings. This changes the directory to //os/settings/ and loads and runs the Configure Tool for you.
With JiffyDOS:
@cd//os/settings/
/configure
run
Without JiffyDOS (example with device #10):
open15,10,15,"cd//os/settings/":close15
load"configure",10
run

Load and run configure from //os/settings/.
The Configure Tool walks you through a series of questions, grouped into a few categories: Date and Time, Mouse Input, Global System Settings, Expansion Memory, Drivers and Go-Menu Places.
Date and time
The yes or no questions about date and time may be answered according to your personal preference. Press RETURN to accept the default option and proceed to the next question.
The option to display the time in the menu bar affects the visibility of the clock after boot up.
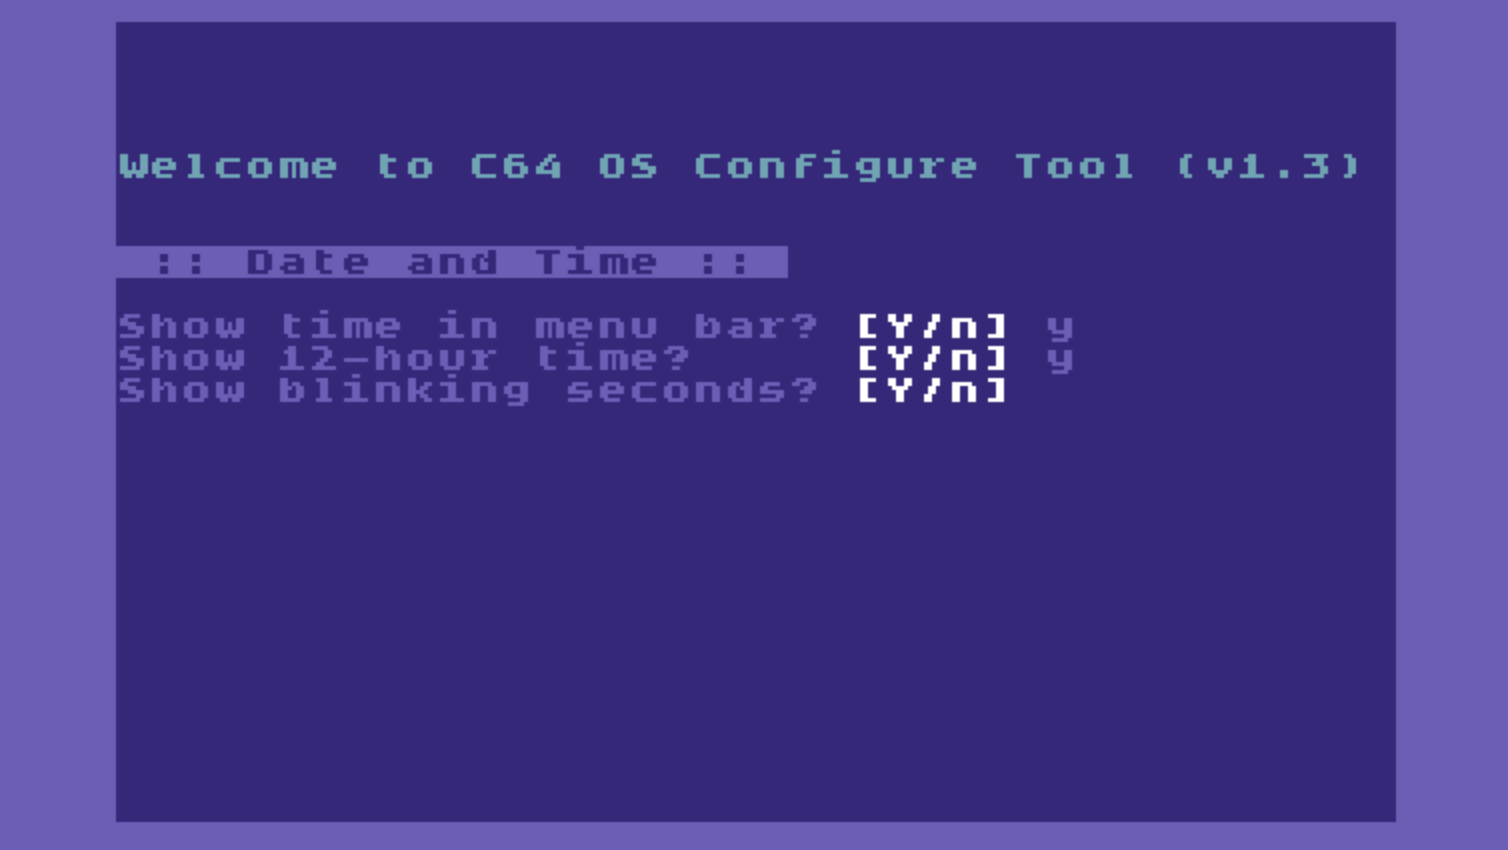
Date and Time configuration.
Toggle display of clock
Visibility of the menu bar clock can be toggled at any time from within C64 OS by holding the COMMODORE key and clicking once on the right end of the menu bar.
Mouse input
C64 OS comes with 4 built-in mouse pointer styles, choose whichever style you prefer, or press RETURN to accept the default pointer style.

Customize mouse pointers
Mouse pointer files are found in the //os/pointers/ directory. Mouse pointers can be edited using Desktop Designer, a fun and useful C64 OS Application, sold separately.
The inner and outer colors of the pointer can be changed. The defaults are a nice visually contrasting black outline with a yellow fill. If you have difficulty seeing the pointer, you can adjust the colors to have a higher contrast against typical backgrounds.
The mouse can be configured for left-handed or right-handed use, which swaps the roles of the left and right buttons.1
Mouse wheel settings only take effect if you are using a MicroMys or MouSTer mouse adapter, with the appropriate driver, and you are using a PS/2 or USB mouse with a wheel. Classic is how mouse wheels were originally written to work; when you roll your finger towards yourself, you scroll further down closer to the end of the content. Natural scrolling was introduced by Apple to imitate the behavior of scrolling by physically touching the content. When you roll your finger towards yourself, you imagine your finger pulling the content down, and thus scrolling you up closer to the start of the content.

Mouse Input configuration.
Additional mouse settings can be configured later, from within C64 OS, using the Mouse Utility.
Global system settings
The CPU busy indicator is a clock animation that appears in the top left corner of the screen if the CPU is occupied for longer than a few seconds. It indicates that activity is taking place that could cause the user interface to become unresponsive. Press "y" to enable this feature, or press RETURN.
There is then a series of questions about keyboard shortcuts that trigger system-level features. You can press "y" or RETURN to accept the defaults. These options also serve to show you that these features exist and how they can be triggered. You can customize them if the defaults are inconvenient.
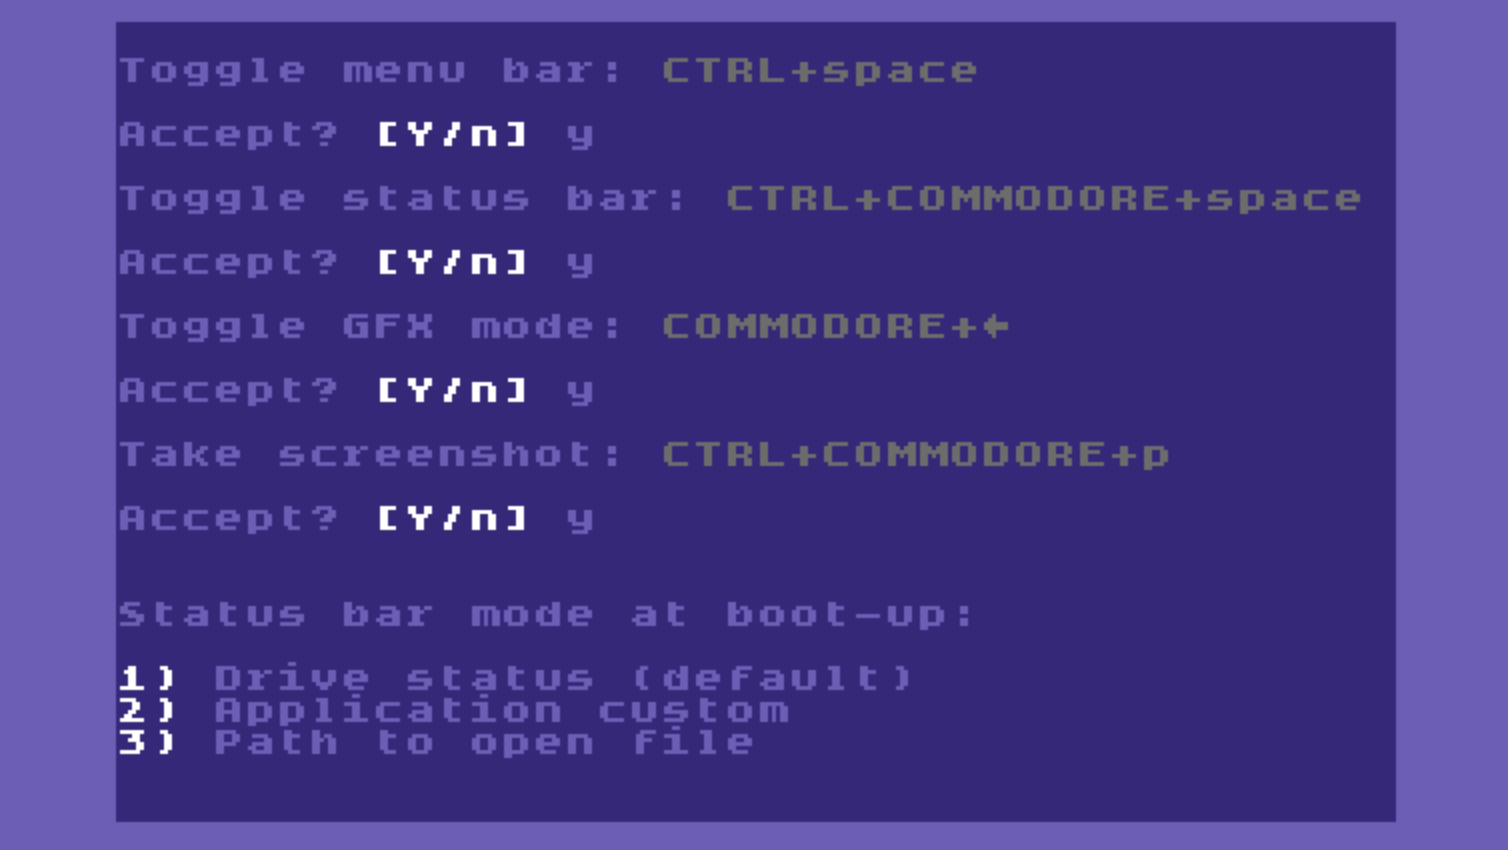
Global System Settings.
The status bar has three display modes. You can choose which mode to start up in. If you do not have a preference, press RETURN to select the default.
For more information about the menu bar, the status bar, and split and fullscreen graphics modes, see Chapter 4: User Interface.
Expansion memory
C64 OS makes use of expanded memory from a 17xx (or compatible) RAM expansion unit to enable a feature called Fast App Awitching. (See Chapter 4: User Interface → Fast App Switching.)
C64 OS auto-detects the presence of an REU and its capacity, and also provides an abstraction layer to help programmers write applications that are able to make use of an REU. This abstraction layer allows you to decide how to allocate expanded memory.
You can choose how many banks to allocate as fast app switching slots and how much to reserve for Applications to use for other purposes. When an REU is available, C64 OS always reserves the first 64KB bank (bank 0) for operating system workspace; temporary cache memory, screen compositing, the switcher component, the current RTC driver, etc. After that, C64 OS uses one additional 64KB bank for each fast-switched app and manages the use of that space dynamically.
| REU Model | Size | Banks | Notes |
|---|---|---|---|
| 1700 | 128KB | 2 | Very small |
| 1764 | 256KB | 4 | Small |
| 1750 | 512KB | 8 | Medium |
| 1750XL | 2MB | 32 | Large |
| Ultimate 64 / REU Grande | Up to 16MB | 256 | Very Large |
If you dedicate all available banks to fast app switching, then an Application that can make use of expanded memory operates as though no REU is available. A happy balance would be to dedicate a few banks to fast app switching, and still leave some for use by Applications that can benefit from more memory.
Technical Note
All RAM expansion units in the 17xx family provide additional memory. But they also provide the C64 with a RAM expansion controller (REC) chip. Even a 1700 REU, which provides only a small amount of extra memory, helps speed up C64 OS. The RAM expansion controller can transfer blocks of main memory faster than the CPU, and C64 OS uses this automatically to accelerate screen redrawing, file copying and archiving, etc.
Press RETURN to accept the default of 0 banks for fast app switching, or use the "+" and "-" keys to adjust the number of slots. A minimum of 2 slots may be selected to enable fast app switching.
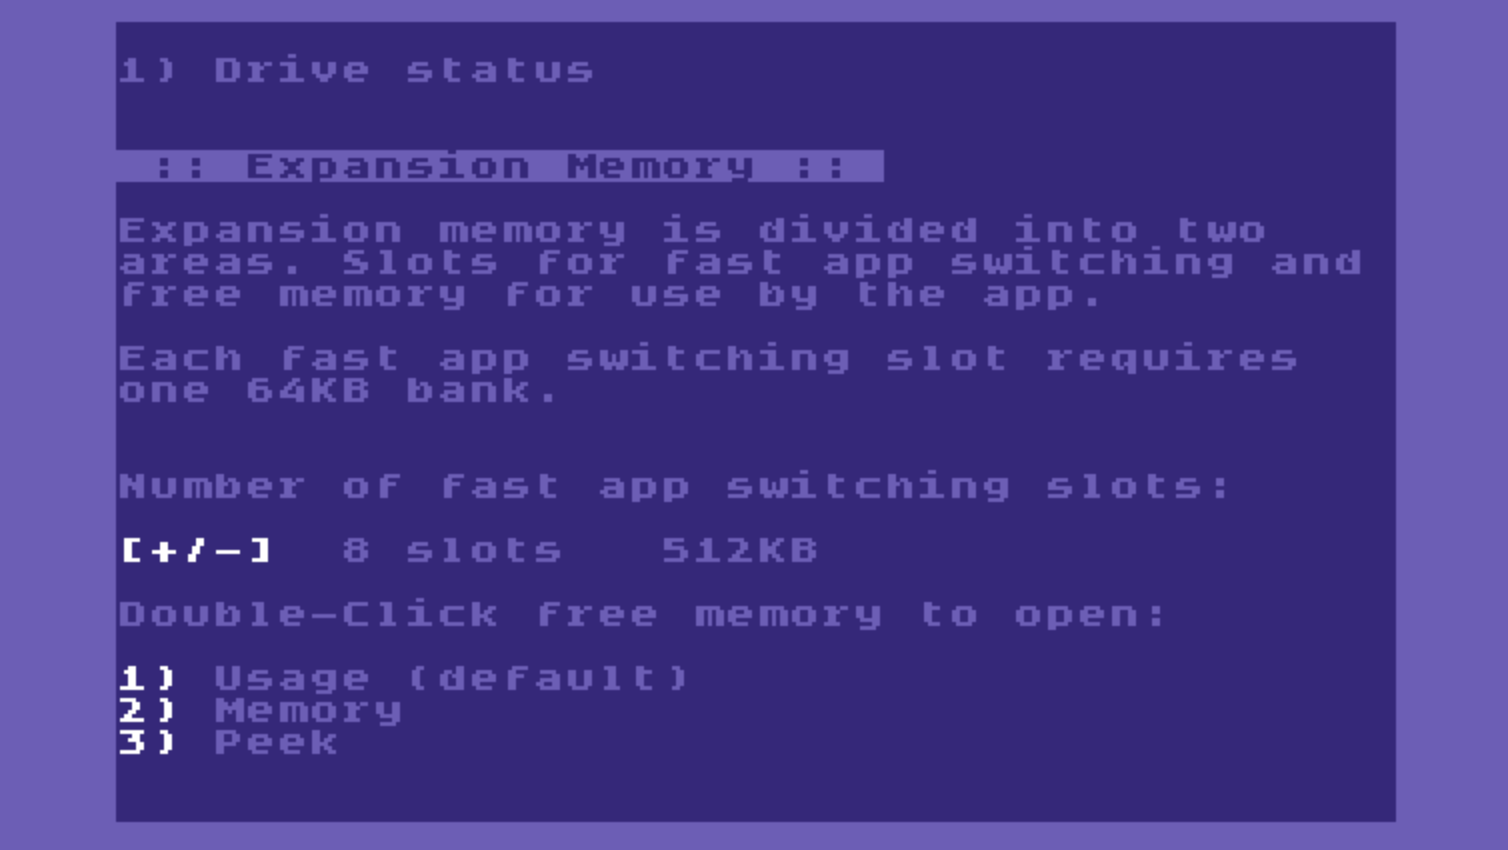
Expansion memory and fast app switching slots.
The amount of available main memory is displayed at the right end of the status bar. The Utility that is opened when you double-click the available memory is configurable.
Press "1" to choose the Usage Utility, this is the default option. The Usage Utility has three tab sections: RAM, REU and CPU. The RAM tab provides a visual map of how main memory is currently allocated. The map shows pages of 256-bytes. The REU tab provides a similar visual map but shows how 64KB banks in the REU are allocated. And lastly, the CPU tab visualizes a rolling usage of CPU in 10 increments over the last 10 seconds.
Press "2" to choose the Memory Utility. The Memory Utility is still available but has been superceded by the Usage Utility starting in C64 OS v1.05. It provides a visual map of how main memory is currently allocated, but in a condensed form, one block representing 2 pages of memory. 2
Press "3" to choose the Peek Utility. Peek lets you examine the contents of your computer's memory and should only be chosen if you are an advanced user or a programmer.
See Chapter 7: Utilities for more detailed explanations of how to use the Usage, Memory and Peek Utilities.
Lastly, C64 OS displays memory quantities in various places. Press "1", or press RETURN, to choose the default option and see memory represented as kilobytes.
Press "2" to see main memory represented as 256-byte pages (the unit is "P"), roughly the same as a disk block, and REU banks displayed as 64KB banks (the unit is "U").
About Memory and File Sizes
Representation in kilobytes is less accurate than pages, but is more familiar for users of modern computers.
Although 256-byte memory pages can seem foreign, there is an advantage to getting used to them. All C64 storage devices display file sizes in blocks, from the READY prompt and the C64 OS File Manager. The accordance between a file size in blocks and free memory in pages makes it straightforward to know how much memory a file of a certain size will take up.
Hardware drivers
The Configure tool provides options for a realtime clock source for setting the system's date and time, and input device drivers for controlling the mouse pointer. Additional drivers, such as for game controllers, keyboards, printers, and network hardware are configured from within C64 OS.
Real-time clock drivers
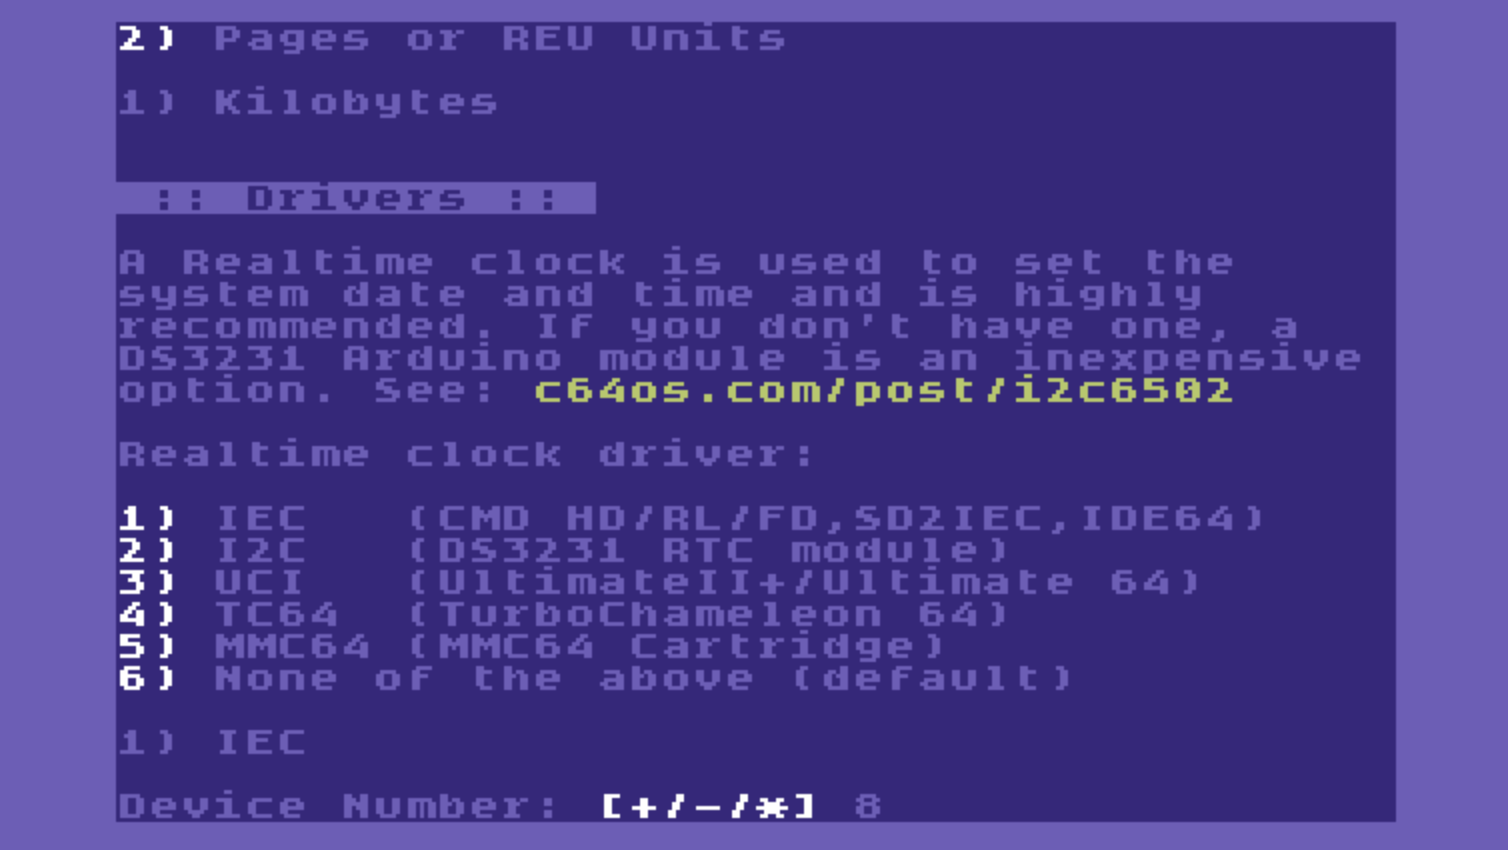
IEC RTC Driver
If you have a storage device that provides an RTC choose the IEC RTC driver. Supported devices include CMD HD, CMD FD, RAMLink, IDE64 and some SD2IEC devices if they include an RTC. Unfortunately most SD2IEC devices don't.
The IEC RTC driver gives you an additional choice either to specify the device # or to allow it to auto-detect. Auto-detection uses the lowest device # at which is found one of the supported devices. You should specify the device # explicitly if you want to use a device other than the one that would be auto-detected.
For example, if you had an SD2IEC on device #8 that does not have an RTC, but you had a CMD FD-2000 on device #11, the auto-detection would consistently select the SD2IEC because it encounters it first. In this situation, you can specify the device # of the CMD FD-2000 explicitly.
The storage device that provides the RTC does not need to be the C64 OS system drive.
SD2IEC and Date/Time Stamping
Most SD2IEC devices do not have an RTC chip, but many still support the RTC read and write commands and also write their current timestamp to files that are written. The SD2IEC boot component, which is enabled by default, reads the date and time from another device that typically has an RTC and uses it to set the date and time on every SD2IEC on the bus.
I2C RTC Driver
I2C is a serial bus for connecting multiple simple devices together. There is a whole family of common components used for Arduino projects that communicate via I2C.

Above is an example, the DS3231 RTC module, which can be connected to either the C64's User Port or Cassette Port. C64 OS includes a libraries that implements the I2C bus. If you do not have another source for a realtime clock this can be an economical solution. These modules are mass-produced and very inexpensive.
See Appendix VII. Libraries → I2C Bus for additional information about how to configure the library for the I2C bus.
UCI RTC Driver
If you are using an Ultimate II+, an Ultimate 64 or Commodore 64 Ultimate, you may choose the UCI RTC driver. The Ultimate Command Interface must be enabled in the device's menu system and its firmware should be updated to the latest.
There is a separate option that allows the date and time to be set. Enable this option if you want to allow C64 OS to set the date and time.


TC64 RTC Driver
If you are using a TurboChameleon 64, you may choose the TC64 RTC driver.

Manual RTC Driver
If you do not have a device which supplies a realtime clock, press RETURN to select the default, none of the above. This selects a special manual RTC driver. This driver reads a manually configured date/time string from the file:
//os/settings/:time.manual.t
For further information about how to configure a manual time, see Additional settings time.manual.t below.
Pointer input drivers
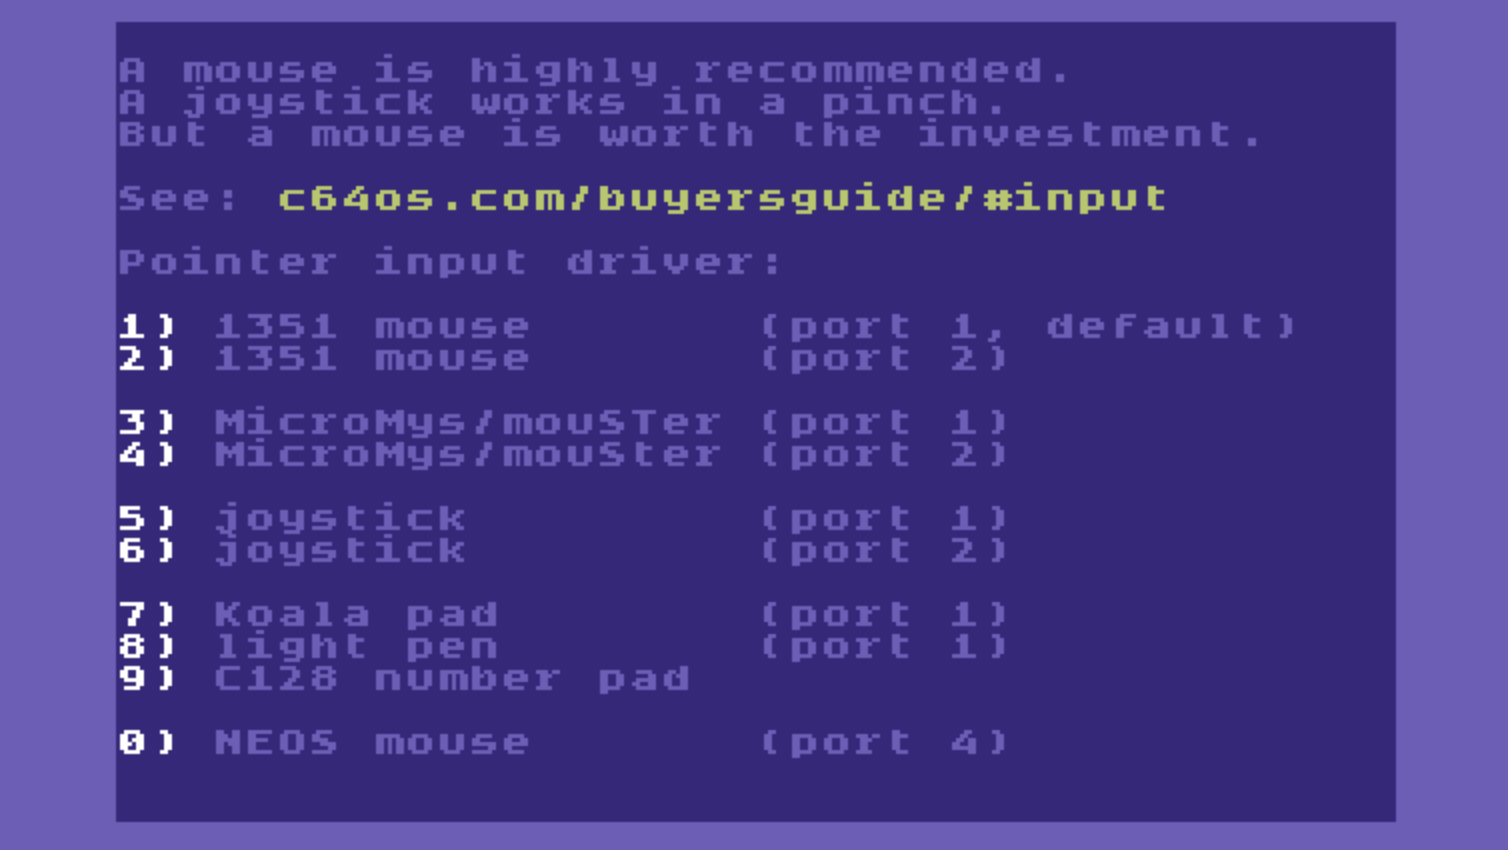
Drivers for Pointer Input.
Next you can select the pointer input driver for the hardware you have. The control port number is specified beside each driver.
1351 Mouse
If you have a 1351 or compatible mouse, choose the 1351 mouse driver. This driver has two versions; port 1 is preferable, but port 2 can be used as an alternative. The 1351 mouse is a two-button mouse. If this driver is used with a modern mouse via an adapter, it only supports the left and right mouse buttons.
MicroMys/MouSTer
If you are using a MicroMys or MouSTer mouse adapter, with a mouse with a wheel, you should choose this driver instead the 1351 driver. The MicroMys/MouSTer driver works most efficiently and reliably in port 1, and provides access to the mouse wheel for scrolling.
Looking to buy a mouse for your C64?
OpCoders Inc. is the official North American reseller for mouSTer. The mouSTer adapter can be purchased from the OpCoders Store, and there is a discounted option when bundled with C64 OS.
Joystick
A proportional mouse is superior to the experience of using a joystick. However, if you only have a joystick you can still use it to control C64 OS. Choose the joystick driver, either for control port 1 or 2.
KoalaPad
The KoalaPad driver can be selected if you own a KoalaPad. It must be connected to control port 1. The C64 OS KoalaPad driver is quite advanced. It uses the relative difference between two points to proprtionally move the input pointer, rather than mapping each point on the pad to a point on the screen. In this way, a KoalaPad in C64 OS behaves more like a modern computer's trackpad than like a miniature drafting tablet.
Light Pen
If you are lucky enough to own a C64-compatible light pen, this can be connected to control port 1 and used as an input device for C64 OS. Note that a light pen requires the use of a genuine CRT tube monitor to function correctly. Light Pen does not support secondary clicking.
Special thanks to Leif Bloomquist for his contribution of the C64 OS Light Pen driver.
C128 Numeric Keypad
C64 OS can be run on a C128 in C64 mode.
This driver enables a set of keys on the C128's numeric keypad to function like a joystick to control the input pointer. The number keys: 4, 5, 6 and 8, are used for left, down, right and up, respectively. The enter key is used for primary click and the zero (0) key is used for secondary click.

Technical Note
For those curious why the keys: 4, 5, 6 and 8 are used instead of: 1, 2, 3 and 5, it turns out there is a key matrix conflict between 1, 2, 3 and 5 such that some combinations for diagonal movement would not be possible.
NEOS Mouse
NEOS mouse uses a special protocol which prevents the keyboard from being scanned properly if it is plugged into port 1 or port 2. The NEOS mouse driver in C64 OS communicates over a modified 4-player game controller adapter which connects to the User Port.
The modification is simple but requires the use of a soldering iron. Read more about how this works in the blog post, NEOS Mouse: Reborn.
Go-menu places
In File Manager, there are 5 configurable places accessible from the Go menu. The Configure Tool can be used to set these automatically to default, valid places. If you choose to accept this option, 5 additional directories are created in the root directory of this partition:
- documents
- downloads
- games
- music
- pictures

Go-menu places.
These places can later be changed from within C64 OS. If you've already configured these places, and you re-run this Configure tool, you can say no this option and it will leave your places set as you've configured them.
"Places" must be validly configured
If a place cannot be found, strange or inconsistent behaviors could result. Choosing to configure default places ensures they are valid. They can be changed later using the Places Utility.
See Chapter 7: Utilities for more information about how to use the Places Utility.
Change configuration at any time
None of the decisions made here are set in stone. You can run the Configure Tool at any time to make different choices and change essential settings. This may be necessary if your hardware setup changes. For example, if you switch from a mouse to a joystick or other input device.
C64 OS configuration is now complete. If you have just configured a fresh installation of C64 OS, then you are now ready to boot up for the first time.
Booting up C64 OS
Once you have run through the Configure Tool at least once on a fresh installation of C64 OS, you are ready to boot C64 OS for the first time.
Load and run "c64os" from the root directory of the device and partition where C64 OS is installed.
Note that the device is not required to have its current partition set as the partition where C64 OS is installed, nor is it required to have its current directory set as the root directory.

Load and run c64os from the root directory.
Regardless of what partition or directory the device is currently in, you may specify the partition and path in the load command. When the booter runs, it automatically takes the necessary steps to ensure that C64 OS boots up successfully. Below are some examples of different ways you can successfully boot C64 OS, regardless of the current partition and directory path.
Without JiffyDOS (example with device #10, partition #1, changing defaults first):
open15,10,15,"cp1"
print#15,"cd//":close15
load"c64os",10
run
Without JiffyDOS (example with device #10, partition #1, loading with path):
load"1//:c64os",10
run
With JiffyDOS (example with device #10, partition #1, changing defaults first):
@cp1
@cd//
↑c64os
With JiffyDOS (example with device #10 as default, partition #1, loading with path):
↑1//:c64os
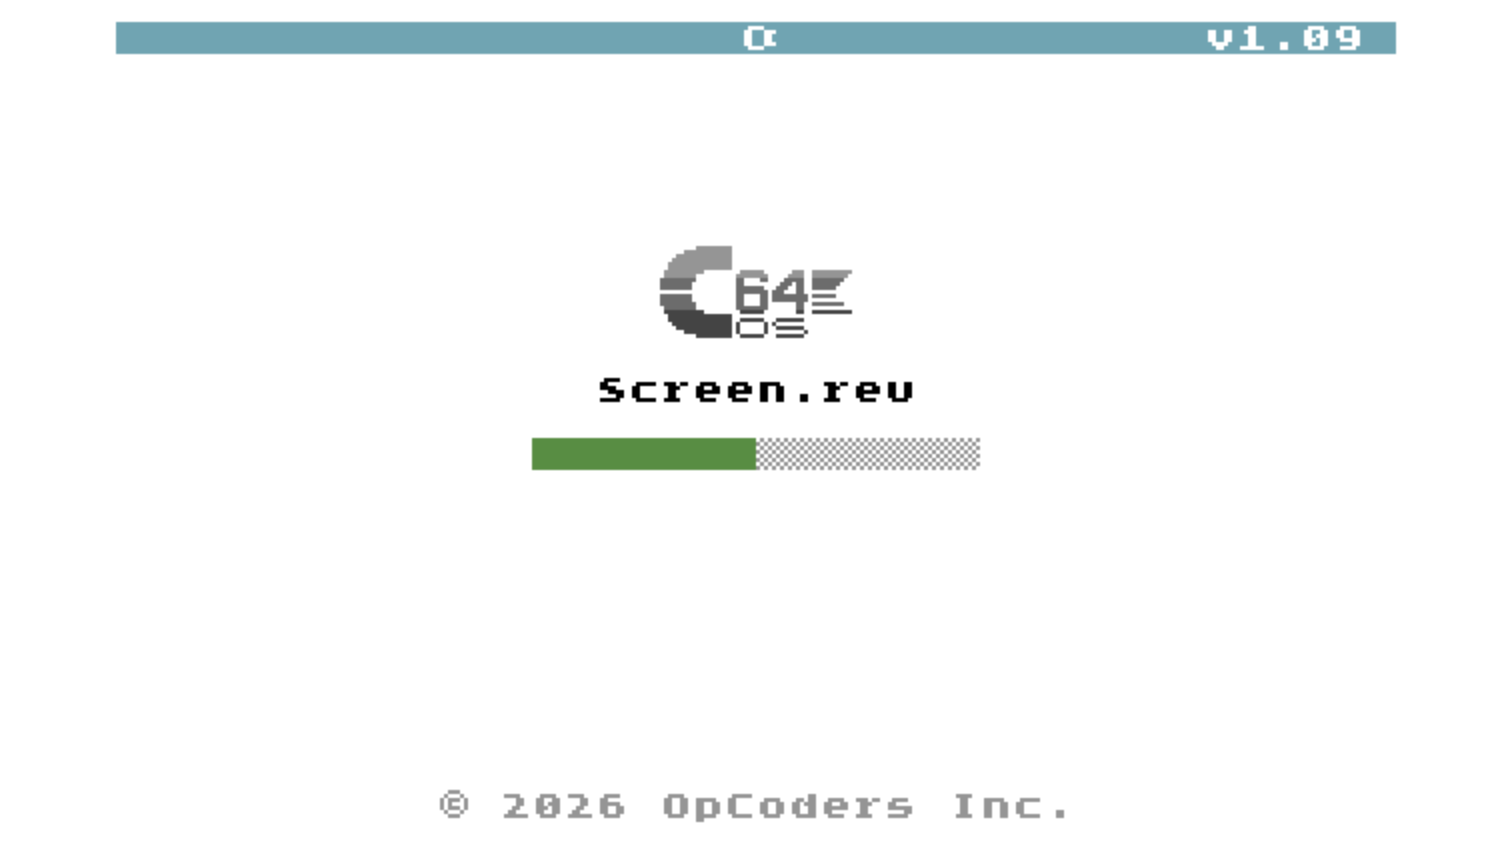
You see a progress meter as the booter loads the system files. Next the settings files are loaded in, drives are detected and mapped, and expanded memory is detected and checked for available capacity.
Once the system files are loaded in, C64 OS automatically launches the last Homebase Application you were in. If you last Quit to BASIC from the File Manager, you are returned to the File Manager when you next boot up. If you were last in the App Launcher, you are returned automatically to the App Launcher.
A fresh installation of C64 OS is configured to open the App Launcher first. This standard splash screen is displayed while launching an Application, showing its installed path and custom icon.
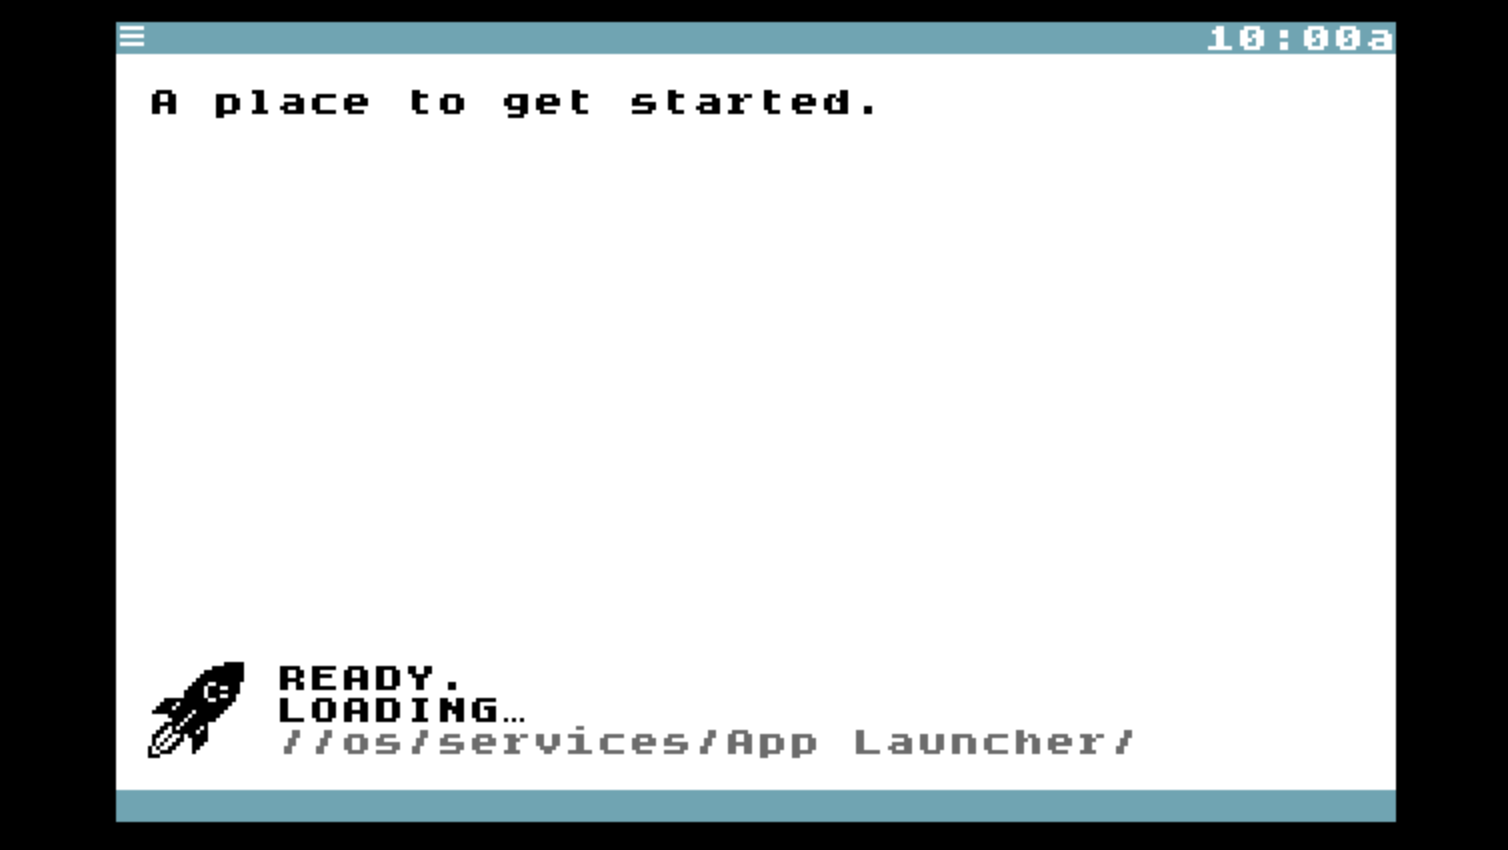
When the App Launcher is finished launching, you see a desktop with aliases to Applications and Utilities that you can open by double-clicking.

The C64 OS App Launcher desktop.
Note: The desktop that you see may not look exactly like the example shown below.
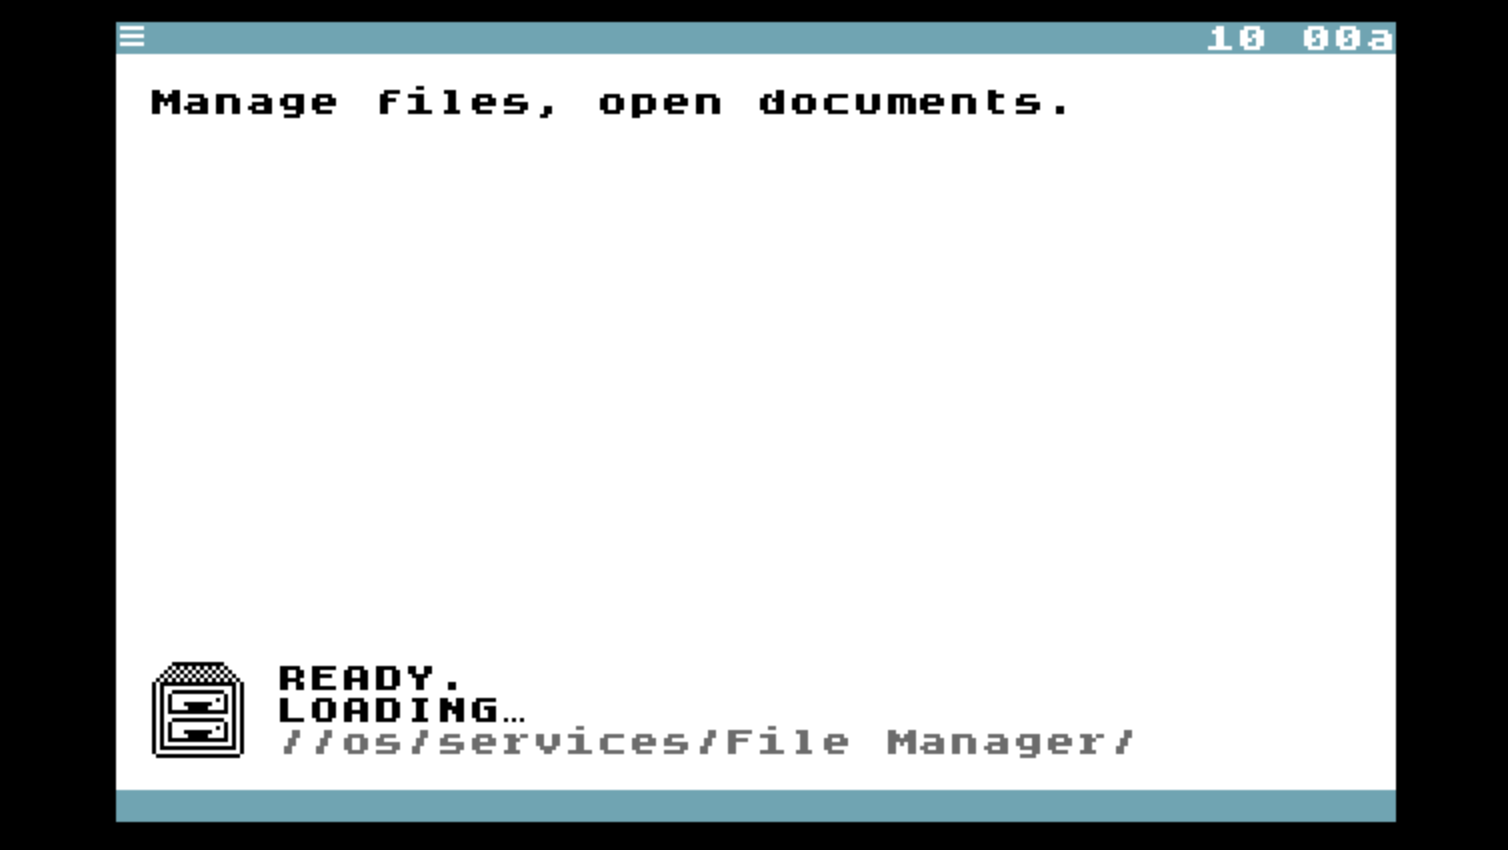
If you were last in File Manager, then when the File Manager is finished launching, you see a directory displayed in one of the File Manager's four tabs. From the File Manager you can navigate the file system, open Applications and Utilities, or open files in an Application or Utility, by double-clicking on them.

Note: The File Manager that you see may not look exactly like the example shown below.
Congratulations
C64 OS is up and running on your Commodore 64. If you're ready to get into C64 OS and explore the user interface and its built-in applications, you can skip ahead to Chapter 4: User interface.
Boot options
If you have an REU and have enabled fast app switching, C64 OS always attempts to fast reboot. If the operating system crashed or you failed to Quit to BASIC or Drop to READY properly, fast reboot may fail with a blank screen.
Three ways to ensure fresh boot
- Power the computer off, and leave it off for long enough for the contents of the REU to be fully cleared. Power the computer on and try to boot again.
- Hold the CONTROL key immediately after attempting to boot C64 OS. This prevents it from attempting a fast reboot.
- Load and run the REU Init program from the c64 tools directory. (//os/c64tools/:reuinit)
Boot modes
C64 OS supports multiple boot modes. Immediately after running the C64 OS booter, hold the number keys, 1, 2, 3, or 4 to selected one of 4 alternative boot modes.
1 - Safe Mode
Safe mode reduces the number of boot components to a core set. The REU is not detected, and therefore not used, and the RTC driver is forced the manual driver. Safe mode can be used to help you boot up reliably if something has been modified in the main components file that is leading to an instability.
2 or 3 - Custom Modes (1 or 2)
Custom modes give you the flexibility to setup alternative sets of boot components that you can choose to use each time you boot C64 OS. A common boot option is to use one of the bitmap boot screens. Custom modes can also be used to streamline boot up for alternative sets of hardware.
4 - Developer Mode
Developer mode loads a special boot component very early on called BSOD64 (Blue Screen of Death 64) that can help debug lockups during boot up when using unstable components under development. It can also be used for special options, such as disabling the clearing of the temporary directory on boot up.
See: Overview of the settings directory → Components.
Programmatic boot mode selection
Starting in C64 OS v1.09 the boot mode can be set programmatically. POKE a PETSCII number from 0 to 4 into address 2 ($0002), then load and run the C64 OS booter as normal. Without any keys held down C64 OS will boot into the specified mode. Mode 0 is the standard boot mode.
poke2,asc("4")
load"c64os",8
run
The above will cause C64 OS to boot into Developer Mode automatically.
Automatic Reboot
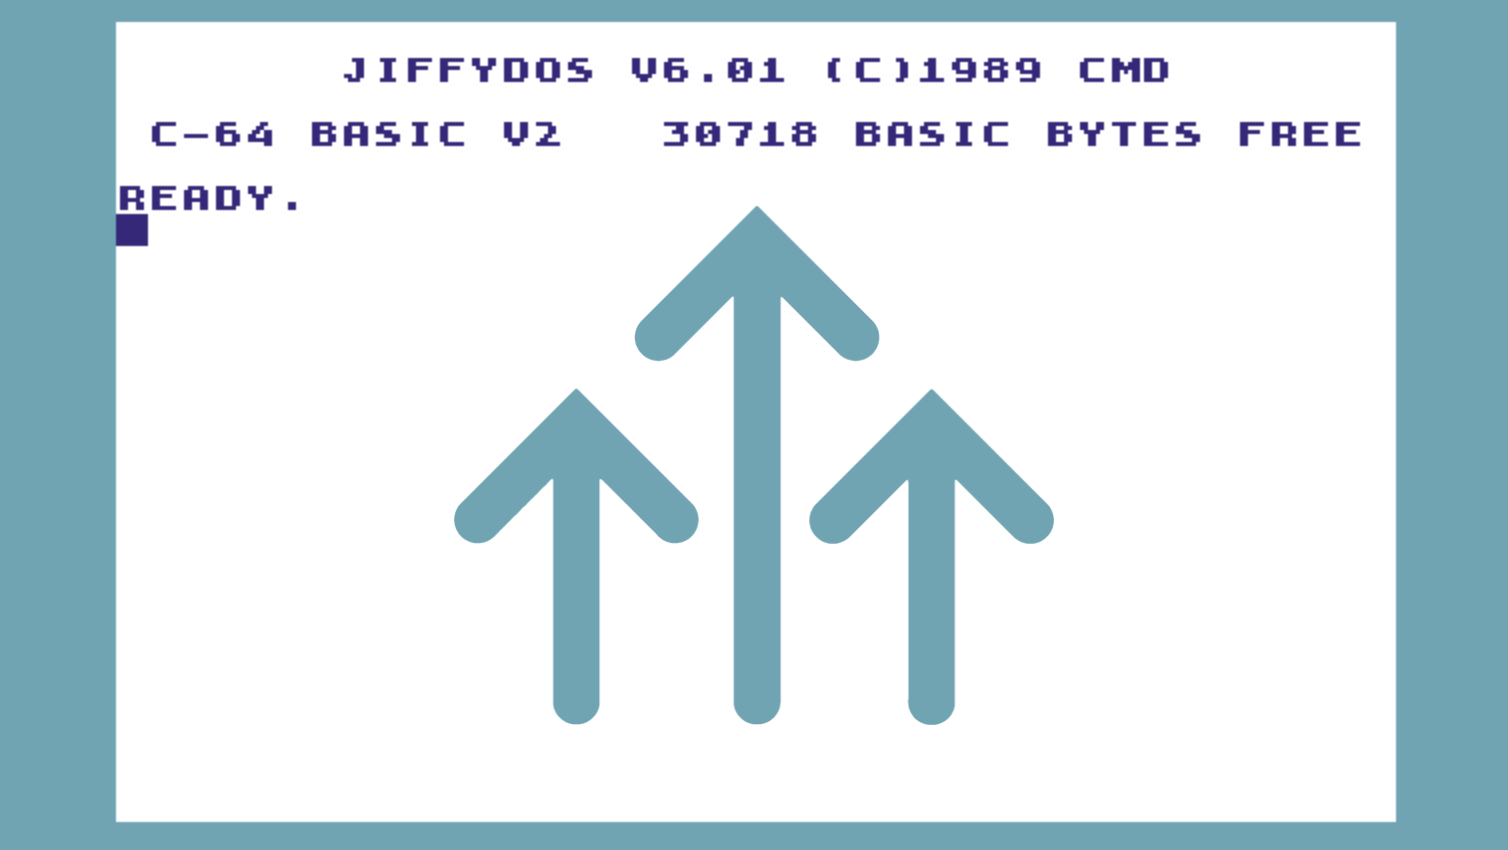
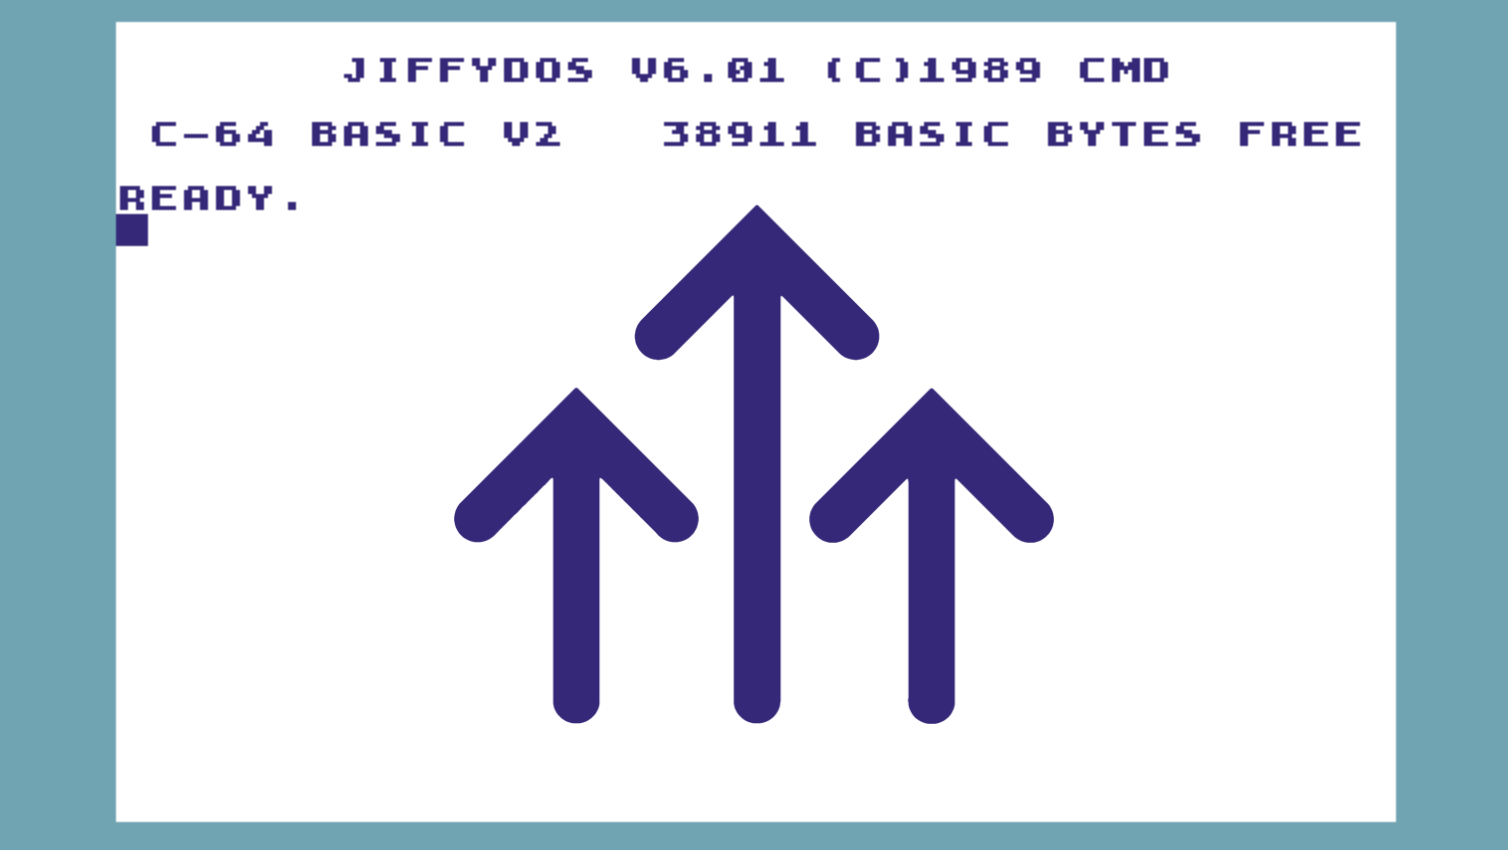
Starting in C64 OS v1.08 a small component is left in memory when you Quit to BASIC from C64 OS. This feature is called automatic reboot. The component is installed where the C64 checks for auto-booting cartridges. As long as the component remains intact in memory, every time the C64 goes through its reset phase the component is run and configures a special key combination that will automatically reboot into C64 OS.
From the C64's initial start up screen, you can tell that the automatic reboot component is installed because it reduces the total available memory for BASIC by 8KB. This displays 30718 BASIC bytes free instead of the usual 38911. See images below.
To automatically reboot C64 OS, press and hold the CONTROL key and tap RESTORE.
Especially when using an REU with fast app switching this automatic reboot becomes quite useful. You can Quit to BASIC, run standard BASIC programs, tools and commands, including performing complex command-line file management tasks. With a single keyboard combo boot directly back into C64 OS.
Compatibility notes
Automatic reboot is not compatible with IDE64 and is disabled automatically. IDE64 has its own autoboot feature though which can be used to help boot into C64 OS automatically.
If for some reason automatic reboot is not compatible with your hardware set up, (or if you do not want this feature for any other reason,) auto reboot can be disabled by moving or renaming the component. It is recommended to change the extension from .o to .bak
//os/library/:c64autorstr.o

To disable, rename to:

//os/library/:c64autorstr.bak

To re-enable, rename back to:

//os/library/:c64autorstr.o
Other boot options
On boot, the booter reads a setting indicating the last-used Homebase Application and launches it automatically when startup completes. You can override which Homebase Application launches first using key combinations while it is loading settings.
These key combinations are only checked while loading settings (shown in the boot progress meter). They match the Homebase Go-menu shortcuts for switching to App Launcher or File Manager.
Force Load App Launcher
Hold COMMODORE+L to override settings and force the booter to launch App Launcher first.
Force Load File Manager
Hold COMMODORE+F to override settings and force the booter to launch File Manager first.
Abort Boot Process
Up until late in the boot up process, you can abort the boot up and cleanly reset the C64 back to the READY prompt by pressing the STOP key.
Developer Boot Option
If you are booting up in Developer Mode, you can tap the RESTORE key at any time to enter the BSOD64 debugger.
Additional settings
Within C64 OS, you can open the Settings Utility. The Settings Utility gathers together several Utilities that are related to managing C64 OS and adjusting its settings. These are organized into useful groups so they're easy to find.
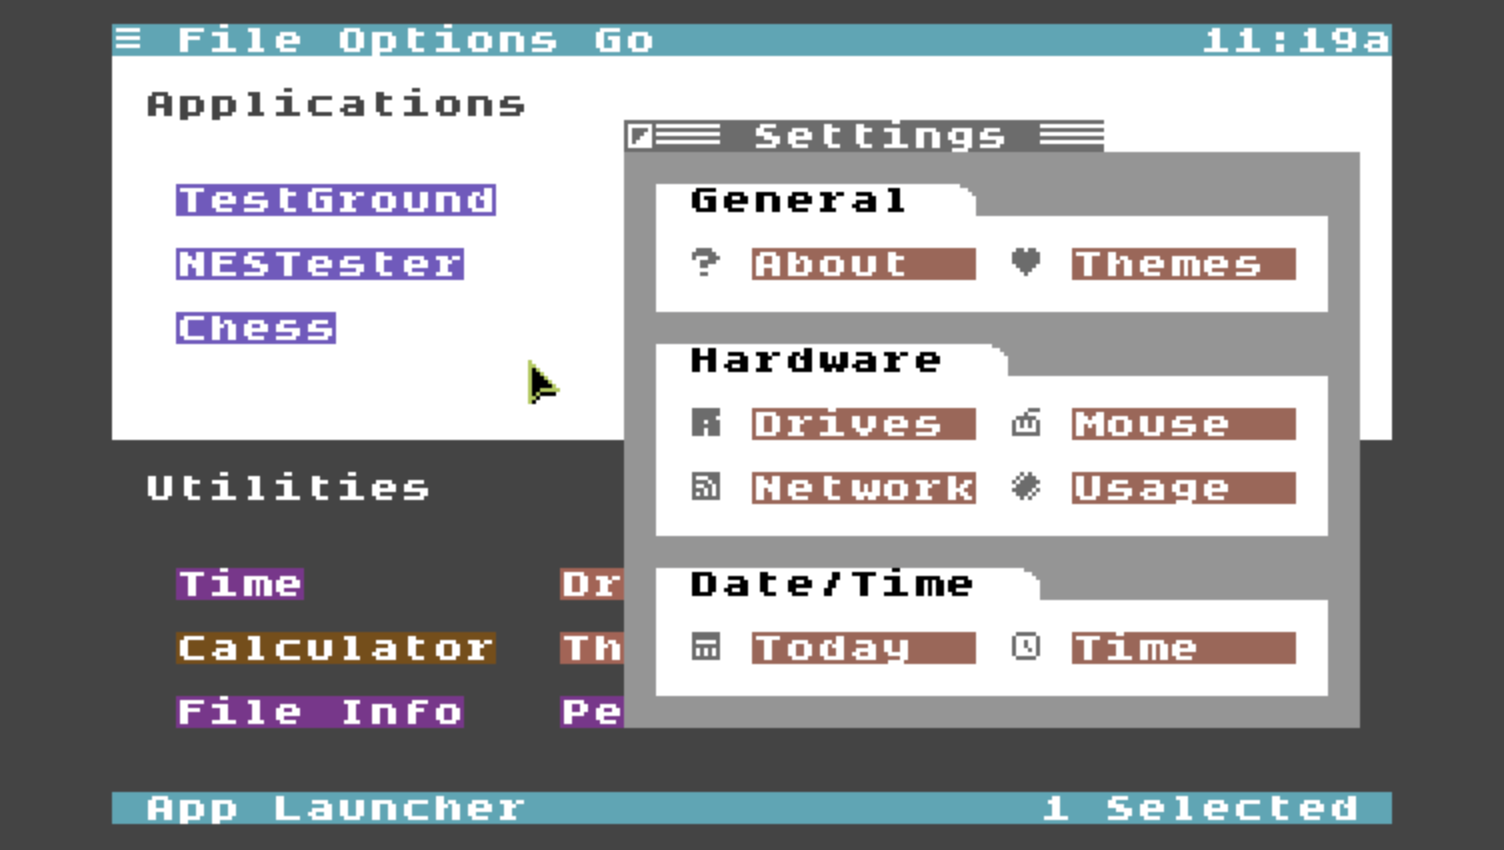
The Settings Utility is available in the Utilities menu so it can be accessed from within any other Application. And because the Settings Utility opens other Utilities, only a single entry in the Utilities menu is necessary for any Application to get access to most system settings.
For more information about how to use the Settings Utility, and how to use the individual Utilities that it gives you access to, see Chapter 7: Utilities → Settings.
Advanced Settings and Configuration Information
Applications, Utilities and many system features are highly configurable. The data files used to store configuration are divided into two different kinds: state and settings.
State Files (*.i)State files end with a ".i" extension and are in a binary format that is generated automatically by the Application or Utility. The ".i" extension stands for initialization. It is safe to scratch these files, because Applications and Utilities have built-in default values, which are only overwritten by an initialization file if one is found.
State files are automatically regenerated the next time the Application or Utility saves its state.
Settings Files (*.t)Settings files end with a ".t" extension and are in a text format that can easily be edited with a text editor or produced with a few commands from the READY prompt.
Don't Scratch Settings (*.t) Files
Settings files must not be scratched. Settings files are not automatically generated, and if a settings file cannot be found the process that depends on it will not function correctly.
Unlike state files, settings files can be and were intended to be edited by hand. This can give you access to features that aren't exposed by the graphical user interface. Care must be taken that the files remain in the correct format and have values that fall within acceptable ranges.
Hacking is fun and C64 OS encourages it. But if you plan to experiment, make a backup of any settings file before modifying the original. If something goes wrong, you can use commands from the READY prompt to restore the original file.
Make a quick backup of a settings fileHere's an example of the copy command, to make a backup of a file before you experiment with changing the original.
Without JiffyDOS:
open15,8,15,"c:config.t.bak=config.t":close15
With JiffyDOS:
@c:config.t.bak=config.t
You can also use the C64 OS File Manager to backup individual files, or even the entire settings directory all in one go. See Chapter 6: File Manager → Copy and Move Files
Now you can modify config.t without worrying about breaking anything. If something goes wrong, use File Manager to scratch the broken file and copy the backup back to the original. If something goes very wrong and you can't boot C64 OS, you can always use the READY prompt to restore the backup, using commands like this:
Without JiffyDOS:
open15,8,15,"s:config.t":close15
open15,8,15,"c:config.t=config.t.bak":close15
With JiffyDOS:
@s:config.t
@c:config.t=config.t.bak
Settings Directories
There are two places where state and settings files are stored. If the state or settings are global to the whole operating system, they are stored in the system's settings directory:
//os/settings/
Some state and settings are customizable per Application. A Utility does not have its own bundle directory, but is always run alongside an Application that does. Thus, Utilities that store state per Application write their state file into the bundle directory of whatever Application is currently running.
//os/applications/App Name/
Helpful Hint
Software is not always perfect and occasionally a state file could become corrupt or hold onto invalid data.
If something—like a Utility—suddenly starts misbehaving, such as crashing or locking up, one easy way to resolve a potential problem is to scratch its .i state file. The next time the Utility is opened, it generates a new one with valid default values. This won't necessarily solve the problem, but it might. You should try this if a Utility works well when opened in one Application, but is misbehaving when opened in another.
Overview of the settings directory
Below is an overview of the contents of the system's settings directory. As you add new Applications and Utilities to C64 OS, the contents of this directory will grow. State and settings files store sequential data, so they all have the SEQ file type.


Using the TextView Utility, you can easily view the contents of a text file. For illustrative purposes and to give you a glimpse into the system's organization, below is the content of the components.t file, opened in TextView from the File Manager.

Using the JiffyDOS "@t" command, you can easily list the contents of a text file from the READY prompt. Below is shown the partial content of components.t.
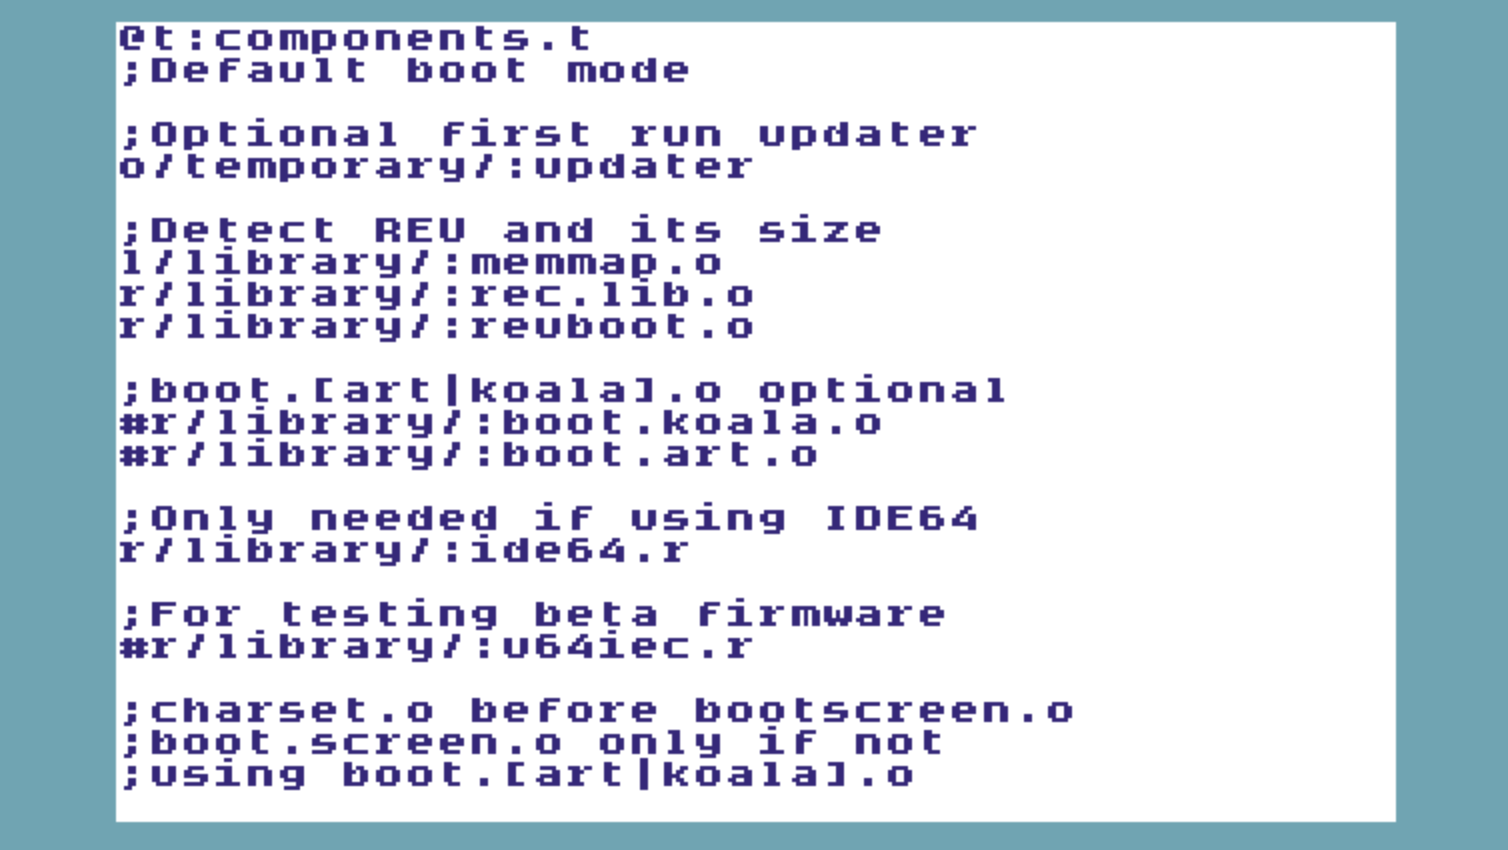
These files are found in the system's settings directory and are used during the boot process to specify the modules and components to be loaded, in what order, and with some additional configurable flags.
//os/settings/
Components
The components.t file lists a small set of files that are typically stored in the library directory. Components are loaded in very early, because other parts of the operating system depend on them. Some are loaded and left in memory, some are loaded and run immediately but are later expunged from memory. Others are loaded, and deferred for running later in the boot process.
When alternative boot modes are used, the booter reads from alternative components files. A set of four additional components lists are found in the settings directory: components1.t, components2.t, components3.t and components4.t. These numbers correspond with the number held to select the boot mode.
ModulesThe modules.t file lists the KERNAL modules to load. Special flags allow for different versions of KERNAL modules to be selected at boot time depending on the hardware that has been detected.
These two files (components.t and modules.t) are unlikely to be edited by the typical user, but show that even low-level parts of C64 OS make use of human readable settings files. More information about how these and other files are structured can be found in the C64 OS Programmer's Guide.
Other Settings FilesAfter installing the KERNAL modules the booter installs the Toolkit classes listed in tkclasses.t. Finally, the booter loads in all the settings files needed for configuring the operating system.
Each of the sections described above in the Configure Tool deposits an encoding of your configuration choices into a settings file found in the system's settings directory.
| Configure Section | Settings Files |
|---|---|
| Date and Time | time.t |
| Expansion Memory | memory.t |
| Global System | config.t |
| Go-Menu Places | *.path.t |
| Hardware Drivers | *.drv.t |
| Mouse Input | mouse.t |
| Network | network.t |
For a much more detailed description of the format and function of each settings file, see the section on State and Settings in the C64 OS Programmer's Guide.

Contents of several common settings files.
Several useful settings files
There are several settings files which are useful to know about. These can be used for reference and some can be fruitfully changed by hand without a great deal of technical knowledge.
version.t
Once booted up, the C64 OS version number can be found by opening the About C64 OS Utility. This Utility shows some credits, a copyright notice, the C64 OS logo, and the version number.
The version number is stored in a settings file. If you have multiple copies of C64 OS in different places, you can check this file to see the version of that copy.
//os/settings/:version.t
build.t
Once booted up, the C64 OS build number can be found by opening the About C64 OS Utility. This Utility shows some credits, a copyright notice, the C64 OS logo, and the version number. Click the version number to toggle it to display the build number.
The build number is stored in a settings file. If you have multiple copies of C64 OS in different places, you can check this file to see the build of that copy.
//os/settings/:build.t
system.t
One of the steps in the C64 OS Setup Tool, described in Chapter 2: Installation, is to specify the name of the system directory. The Setup Tool confirms that a system directory with that name exists and writes it into the C64 OS booter.
Additionally, the name of the system directory is written into:
//os/settings/:system.t
It must be in the format //dirname with no trailing slash.
time.manual.t
The date/time string read in by the manual RTC driver (which is selected if you do not have a source for a realtime clock), is found in the file:
//os/settings/:time.manual.t
Here is an example of how you can change the manual date/time string with just a few commands from the READY prompt.
open2,8,2,"@//os/settings/:time.manual.t,s,w"
print#2,"21/05/14 09:00:00"
close2
The date/time string is formatted as follows. Each field requires two digits, use a leading zero on single digit numbers. The year is only two digits; the lowest year is "80" which is interpreted as 1980, up to the highest year "79" which is interpreted as 2079. Months range from 01 to 12. Days range from 01 to 31. Time is in the 24-hour format.
YY/MM/DD HH:mm:ss
21/01/30 09:05:00
Quick Access Paths
The File Manager has a Go menu, under which are listed several places in the file system that can be quickly jumped to. Three of these are defined by the system: The Applications directory, the Utilities directory, and the System directory itself.
There are five more quick access paths in the Go menu that are user definable. Downloads, Documents, Games, Music and Pictures (with corresponding keyboard shortcuts F8, F1, F3, F5, F7.) Each time one of these is chosen its path is read from a corresponding settings file in the system's settings directory. The files are:
xfers.path.t
docs.path.t
games.path.t
music.path.t
pictures.path.t
Each of these files holds a single path, in the C64 OS file reference format. For example:
8:4:://documents/
For more information about the file system and C64 OS file references, see Chapter 8: File System.
The Places Utility
Quick Access Paths can also be managed from within C64 OS using the Places Utility. But it's nice to know that even when there is a graphical user interface for changing settings, those settings are stored in human readable text file format, and stored in sensible places, like the system's settings directory.
Next Chapter: The User Interface
- Right- and left-handed options are not available on the NEOS mouse. For technical reasons the NEOS mouse always operates as though for the left hand. [↩]
- Memory Utility remains an option because it is lighter than the new Usage Utility. It loads faster and uses less main memory to open, but offers fewer features and looks older. [↩]
Table of Contents
This document is subject to revision updates.
Last modified: Jul 21, 2026